Getting Messy with mixed media

My ideas for scrapbooking or any craft has always been influenced by what’s happening or what I desire in life. I still remember the quilted pillow i made my college sweetheart because he loved hugging a bolster when sleeping, or the painted glass jug I gave to a friend to store her paper lucky stars in when looking for a job, or the wooden photo frame we have all made as a first handmade gift to a childhood friend.

I was really surprised with what I came up with in class when we were asked to cut out patterns with our freehand and could basically create whatever shapes we wanted. The class was on mixed media experimenting with modelling paste and water based paint.

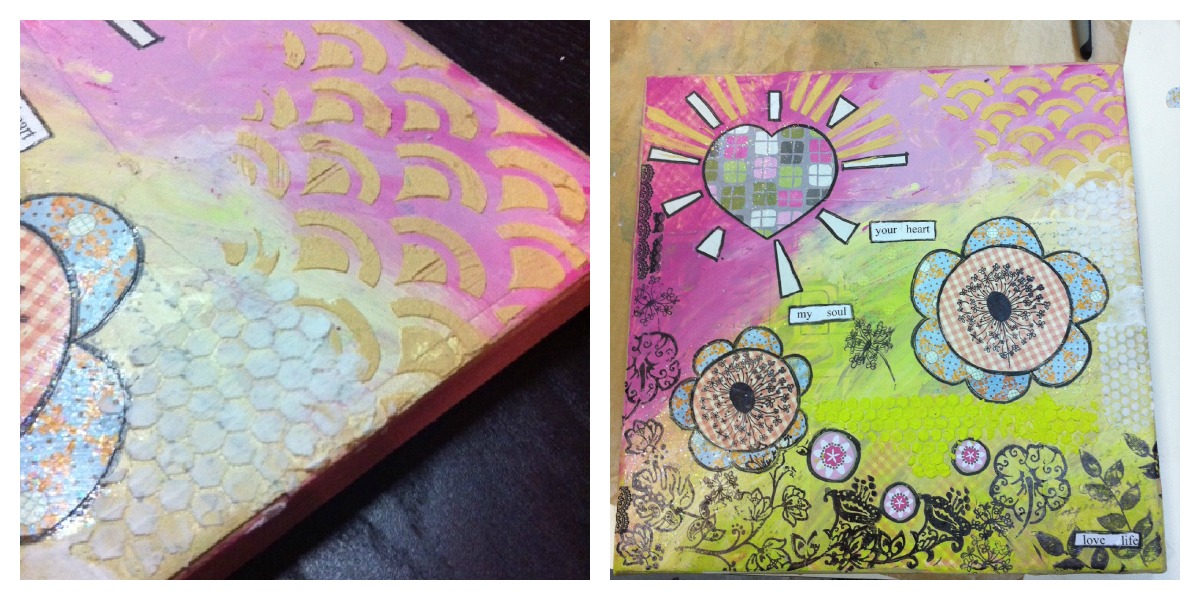
I love simple shapes (because I can’t really draw) and without really thinking about it (coz of limited time in class so you just have to go with your intuition) I came up with the two big bright flowers and three little blossoms all under the rays of the heart-shaped sun. Immediately it reminds me of what my hubby said to me recently, “let’s have a family! let’s have babies!”. Since he wants 2 sons and I want a daughter so jokingly we said we should have 3 kids….. hopefully all will be taken good care of by us two the silly looking flowers and blessed by all the happy things in life like the sun shinning on us. So, I am really looking forward to scrapbooking about my family when it all happens (whenever that is : P)

How the canvas came about:

I love getting messy when DIY-ing so used my fingers a lot!

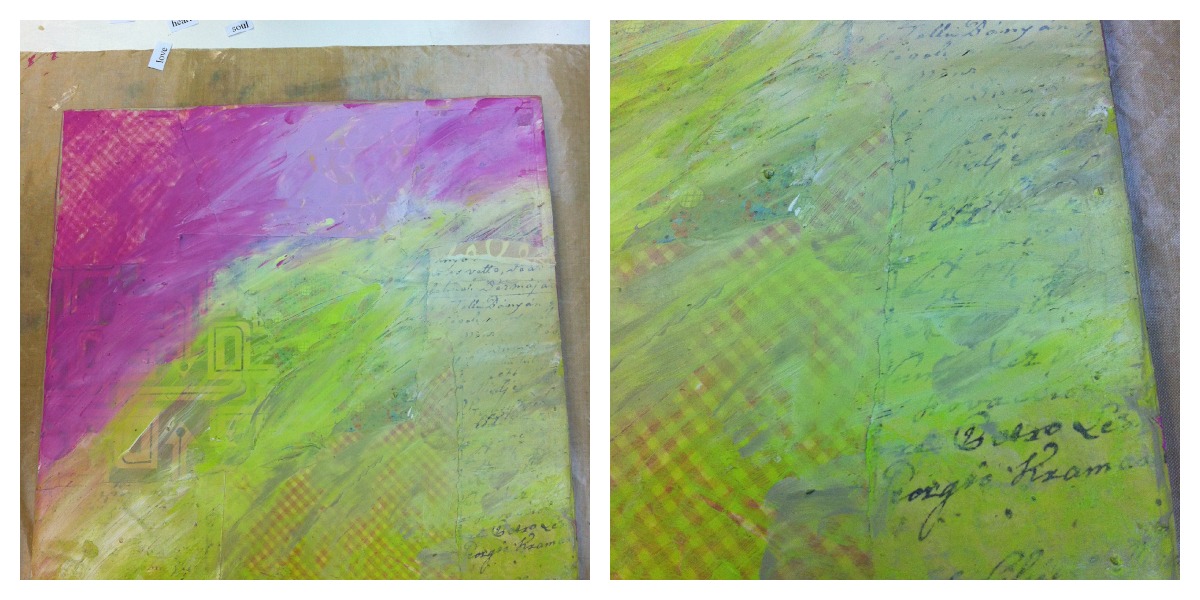
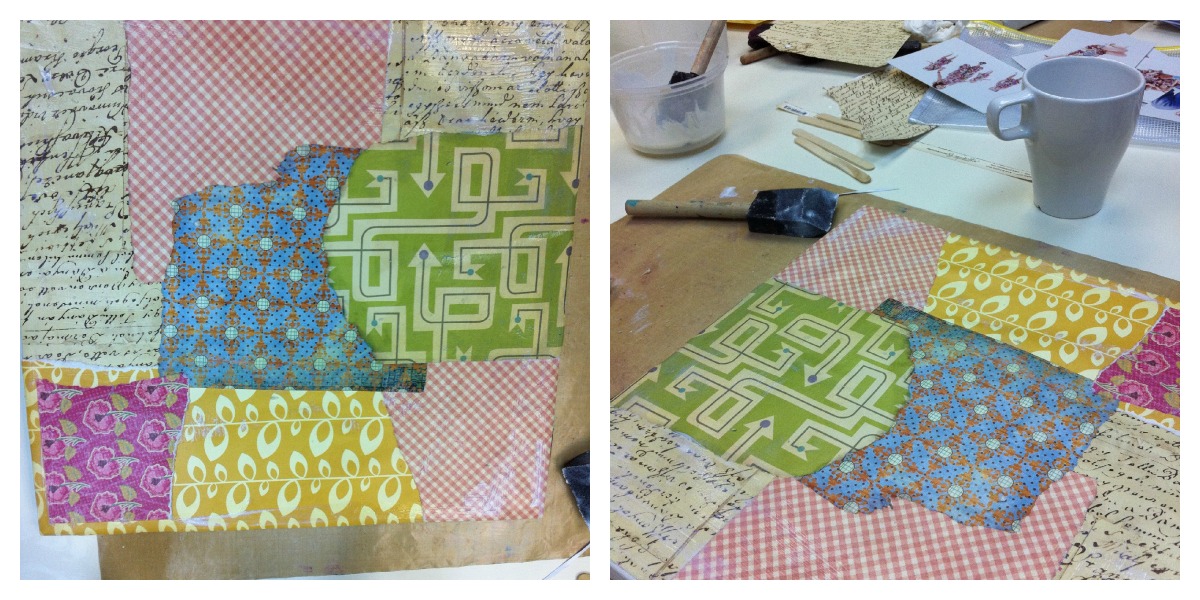
1) If you have loads of scrap papers lying around then this is a good chance to use it. We randomly stuck on patters of scrap papers. We used mod podge as glue and to coat a top layer on the scrap papers. I used my fingers to spread the mod podge. So you can feel the thickness and also more fun.

2) Painted lightly over them with Kaiser craft water paints so you can still see through to the layer of papers below. I deliberately kept the bottom corner layer thin because I really liked the calligraphy showing through.

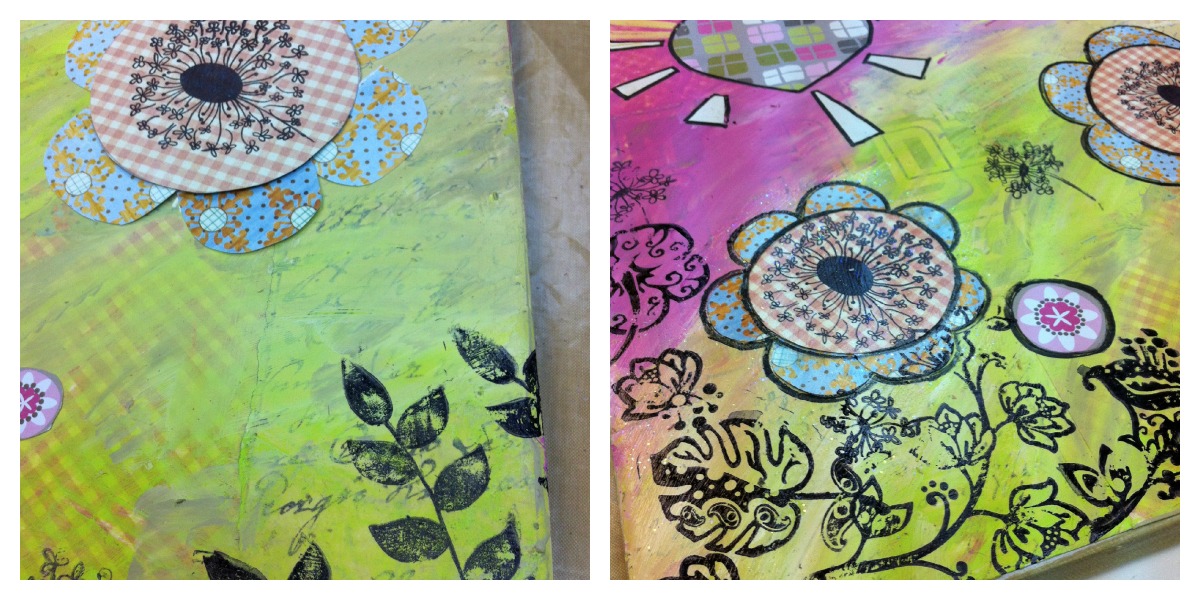
3) then cut out your shapes or whatever overlaying design and arranged them on the canvas. Again use mod podge as glue and also to coat a top layer over the paper patterns.

4) Create another layer with stamps using archival ink. Make sure you use archival ink so it doesn’t run. Use a marker to outline the shapes to bring it out a bit (after the mod podge have dried).

5) Then we masked with a light molding paste.. (there are loads of other types of modelling paste you can use, shimmer, hard, powdery etc and I can’t wait till I try them!). I mixed the modelling paste with a gold paint to create the fan-shapes on top right hand corner. Some others use white with cloud shape, it looked really really nice.

6) Then some rub ons near the border and voila you have a beautiful canvas with whatever colour and shapes you can imagine.

As you can see it only requires a few simple steps and you are only limited by your imagination on what you can put on the canvas. Go get messy!!

The class was taught by Grace, you can see more of her work on her blog! She is very creative and works alot with mixed media.

Best Prima hours

A black and white photo would look really good in this layout as well.

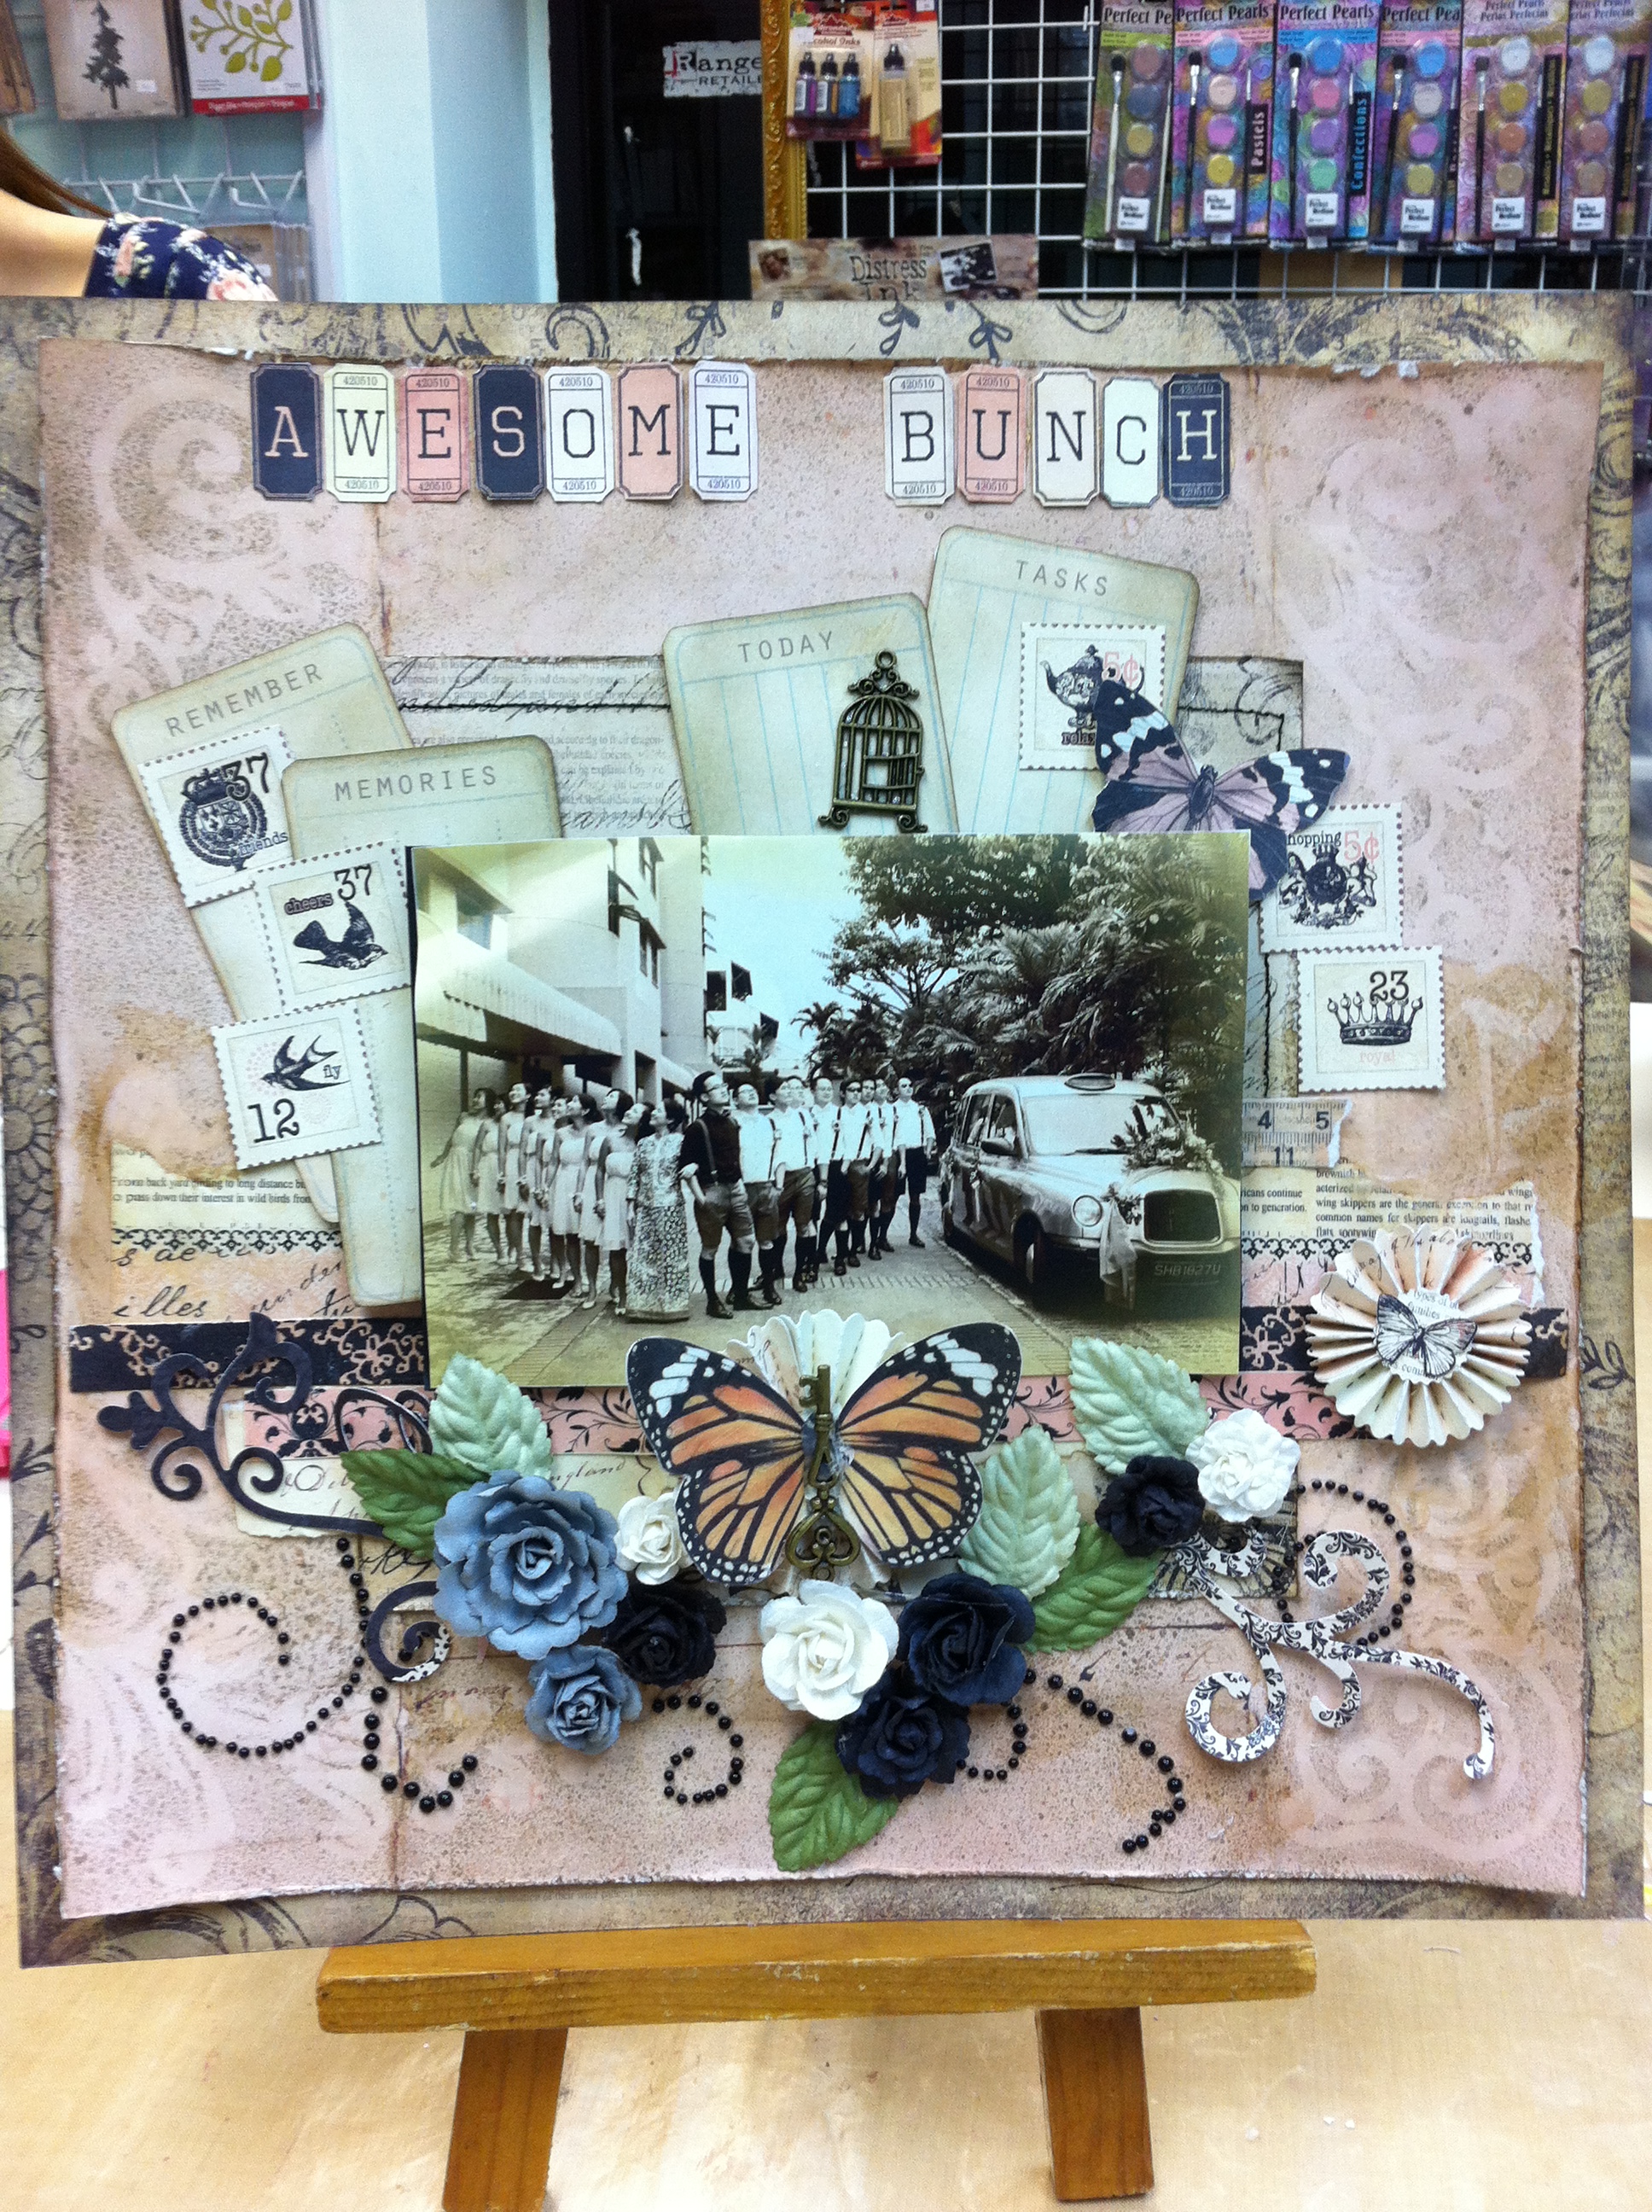
Was initially attacted to the class when I first saw the layout, it looked amazing with all the Prima flowers, embellishments, and the papers were just gorgeous! Best thing about going to classes is that the layout has been planned for you and all you need to do is enjoy putting everything together and engross yourself in how pretty everything is : )

Here’s a quick recap of how the layout was put together.

Start off with three pieces of patterned papers, two were cut and layered to create a three-layers page and the third was used to cut out all the embellishments.

1) Cut the butterfly from the patterned paper (Almanac Collection Libre) and cover with clear crackled paint. The best way is to use your fingers and spread a thick layer over your butterfly. You need a good thick layer before the crackles will show after it dries. It takes awhile to dry so I would usually do this first before anything else.

2) On the Almanac Collection Shaffer backing paper (layer 1 at the bottom), cut a square of approx 7″ by 7″ in the middle. This then leaves the backing paper as a frame and the 7″x7″ square will be used later as another layer (layer 3 at the top). Distress (cropping and inking) the edges of the backing paper and the 7″x7” square.

3) On the other paper Almanac Collection Composition – cut 1cm off each side as this will form layer 2 of the page.  Also distress (cropping and inking) all 4 edges of the paper.

I love misting. They make the background paper alot more interesting and because of the softness it has, it doesn’t kill the pattern on the paper.

4) Mist layer 2 paper by placing the border masks on the 4 corners and using Perfect Pearl Mists to spray at a distance. You can test the distance and pressure on another piece of paper first so you know how vivid you want the pattern to be. The closer you are and harder you press the spray, the more vivid the pattern will be.

You can leave aside to dry or use your heat gun to blow dry it slightly.

(From left) randomly torned strips from left over paper, cutted out and distressed tags and stamps (top right), cutted out letters for title, die cut border using sizzix die (bottom right)

5) Cut and distress the tags, stamps and any letters for your title from the patterned paper (Almanac Collection Libre). Set aside ready for use.

6) With any remaining patterned paper, rip 4 strips – each of different length, width and patterns and some can be just torn rather than cut. Set aside ready for use.

7)  Now adhere layer 2 paper onto layer 1 so it has the layering effect (so it will look like Almanac Collection Composition paper has a border made up of the Almanac Collection Shaffer paper). Then layer 3 can be adhered on top of layer 2. Position the paper with embellishments in mind.

8) To add to the overall detailing of the page, you may also use a sewing machine and in black thread, sew about 0.5cm inside, and along the border of the 7″x7″ on all 4 sides.

Layered page, patterned strips covered in gel medium

9) the page is now ready to be decorated. Taking the 4 strips – add them on top of the 7×7 in any layout you like with different lengths. Apply the Gel Mediums in Matte to stick the strips onto the page as well as on top of the strips. Again using big blobs and spread using brush and make sure it is a thick layer so that the texture effect will come out after it dries.

10) Using Sizzix Die, create a large and a small mini paper rosettes and also some decorative corners. (Note the best way to make the flowers is by using a hot glue gun and glue the ends of the flower first, then flip and press on it so that the flower edge shape appears and then glue the center piece on with hot glue and hold until in place).

Close up of the small rosette with butterfly, you can also see the prima flower and decorative corner being added

11)  Glue the now dried crackled butterfly on top of the large rosettes using dry glue and also the metal key on top of butterfly. Cut the small butterfly from one of the stamp and stick to the small rosettes. Then glue both to to the page with the big butterfly in the lower middle part of the page (beneath where the photo would be).

Large rosettes in the middle with bed of prima flowers. They are so gorgeous and 3D!

12)  Arrange prima flowers (Laraine Black Tie) onto the layout as needed towards the bottom of the page (beneath where the photo would be) and glue in place using dry glue. Also arrange the decorative corners and any decorative pearls as desire. The decorative corners do not have to be glued completely to the page by only gluing the end to create a 3D effect.

I tried to changed the shape of the decorative pearls but didn’t work too well as you can see the crooked shape…. will probably be easier if you use a pair of tweezers to guide the pearls.

13) Arrange the tags with the position of the photo in mind. The tags may be raised and adhered to the page with 3D foam squares. Two at the top of each tag should be sufficient.

14) Using 3D foam squares again, adhere the photo the page positioning it in the middle just above the bed of prima flowers.

15) Finish with adding the metal bird cage, stamp images, smaller butterfly and title as desired.

Items used: prima marketing papers (Item# 844127 Almanac Collection Shaffer, Item# 844110 Almanac Collection Libre, Item# 844097 Almanac Collection Composition),Tim Holtz Distress Ink Pads (vintage photo), We r Memory Keepers Sweetheart Distressing Tool, Perfect Pearl Mists (PPM28314 Heirloom Gold), Claudine Hellmuth Studio Gel Medium in Matte, Sizzix Sizzlits Decorative Strip Die – Mini Paper Rosettes (item #657177), Sizzix Sizzlits Die Set 3PK – Decorative Flourishes Set (item #656538), Prima Marketing Flowers (item #557638 Laraine Black Tie)